# Events
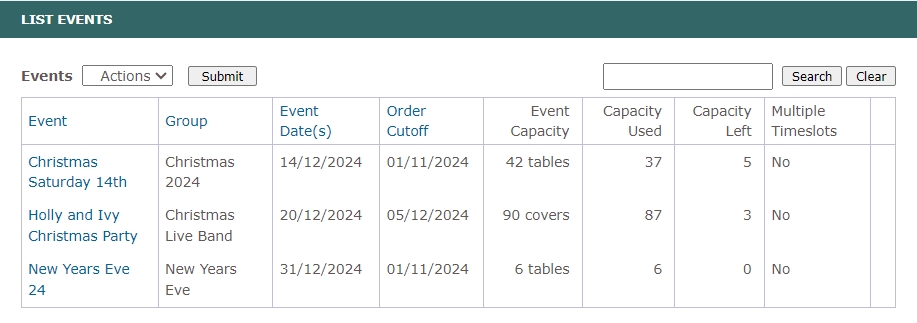
The Events page displays a list of all events and associated event groups. From this screen, you can select, search for, or delete an event.
WARNING
Events must be assigned to an event group. In order to add events, use an existing event group or make a new one. Please follow this link to read more on how to add a new event group.
# Display Event
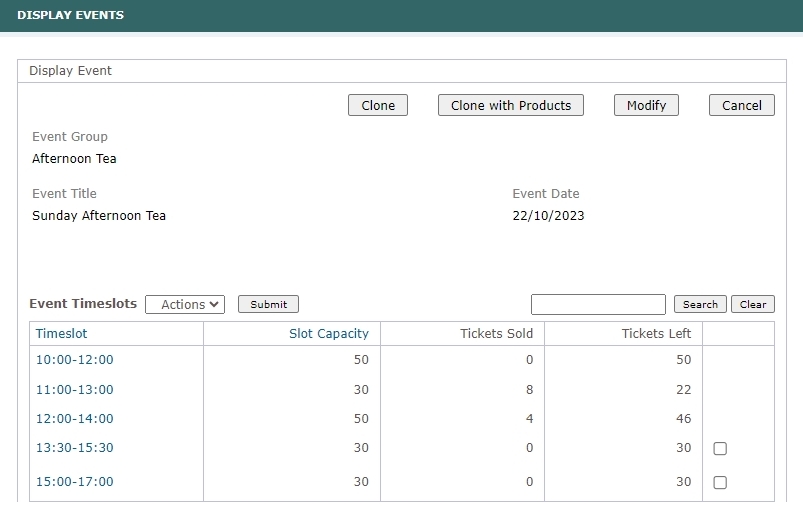
The Display Event screen provides details about the selected event. Here, you can choose to Clone, Clone with Products, or Modify the event. You also have the option to add Event Timeslots by submitting Add under the Actions selection. If there are any specified timeslots, you can modify slot capacity by clicking on the respective timeslot or choose Add action to a new timeslot. This screen also provides information about the number of tickets sold and the number of tickets remaining for the event.
# Add Event
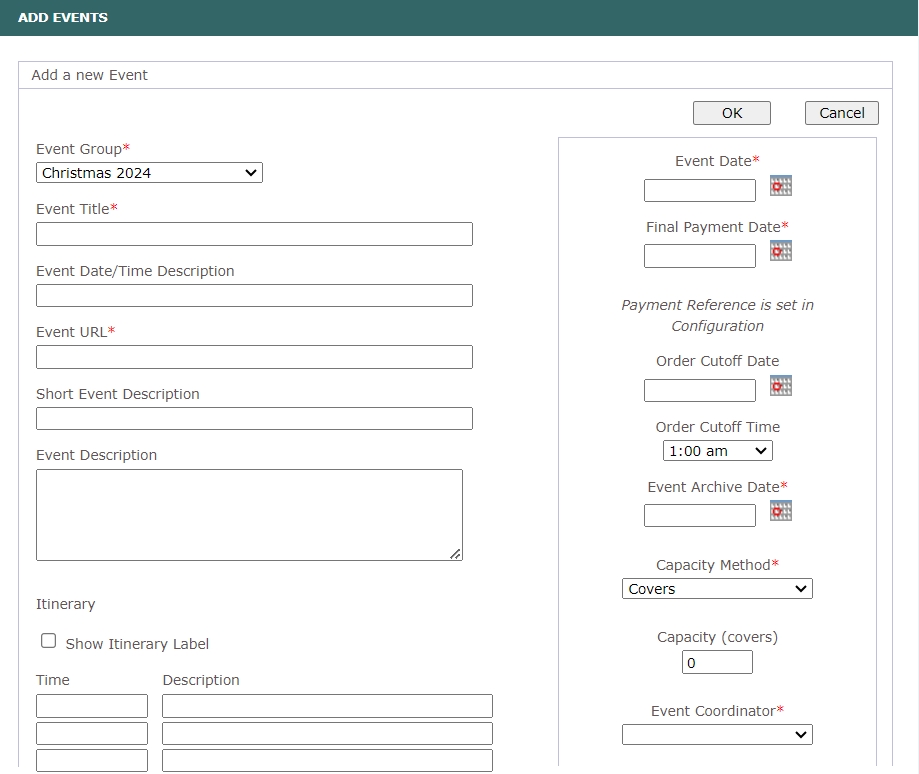
The simplest way to create a new event is to duplicate an existing one. You can do this on the next screen after selecting a specific event. Alternatively, you can either create a new Event Group or use an existing one, and then add a new Event by selecting the Add option within the chosen Event Group.
In the screen Add a New Event, mandatory fields are Event Group, Event Title, Event URL, Event Date, Final Payment Date, Event Archive Date, Event Coordinator, and Tariff. On the Final Payment Date clients will receive an email notification that they have to make the second (final) payment or they will lose their paid deposit.
# Left Side Inputs
Event Group- choose the event group to which this event will belong.- An event must be associated with an event group.
- Each event can only belong to one event group.
Event Title- unique title per event group.Event URLor the so called slug - is a component of the URL that the event will use as part of its link.- This field does not allow spaces; you can use a hyphen "-" to separate words.
- Every event must have a unique slug.
Short Event Description- a short description or tag line. It will show on the event group page and on the event page.Event Description- a long, possibly multi-line description of the event (excluding the ticket details and information). It will be displayed on the event page.Show Itinerarylabel:- If checked the word
Itineraryas a label will show on event page, and the itinerary description will be also shown on the event page. - If unchecked, only itinerary fields (
Time,Description) will be shown, the label and narrative will be hidden on the event page.
- If checked the word
- Time and description will be shown in a timeline on the event before the event description.
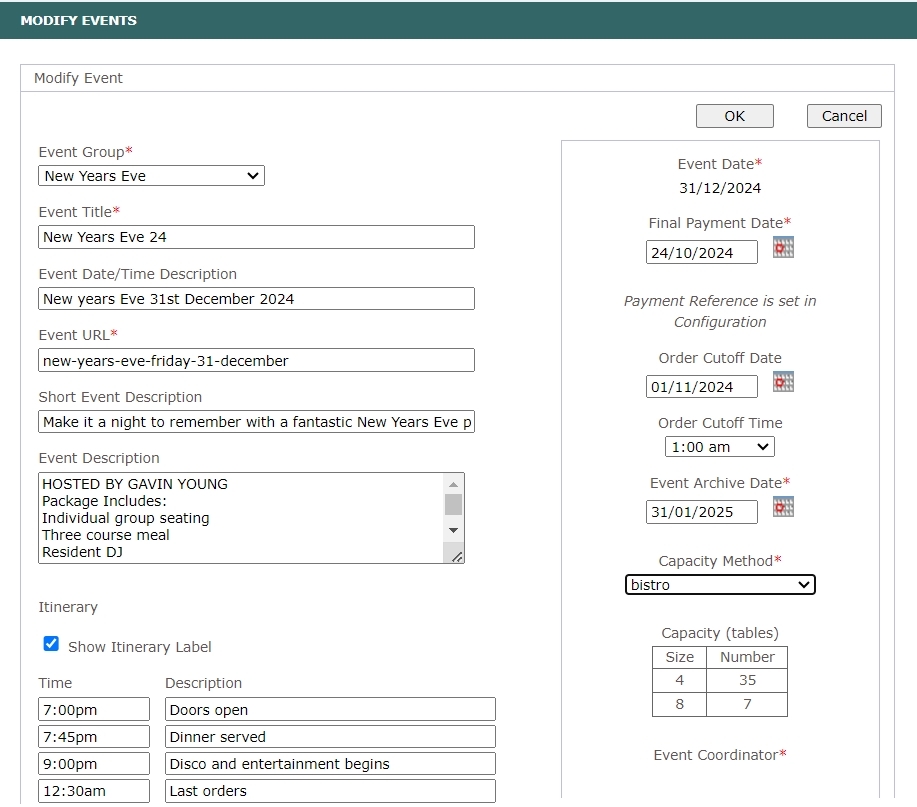
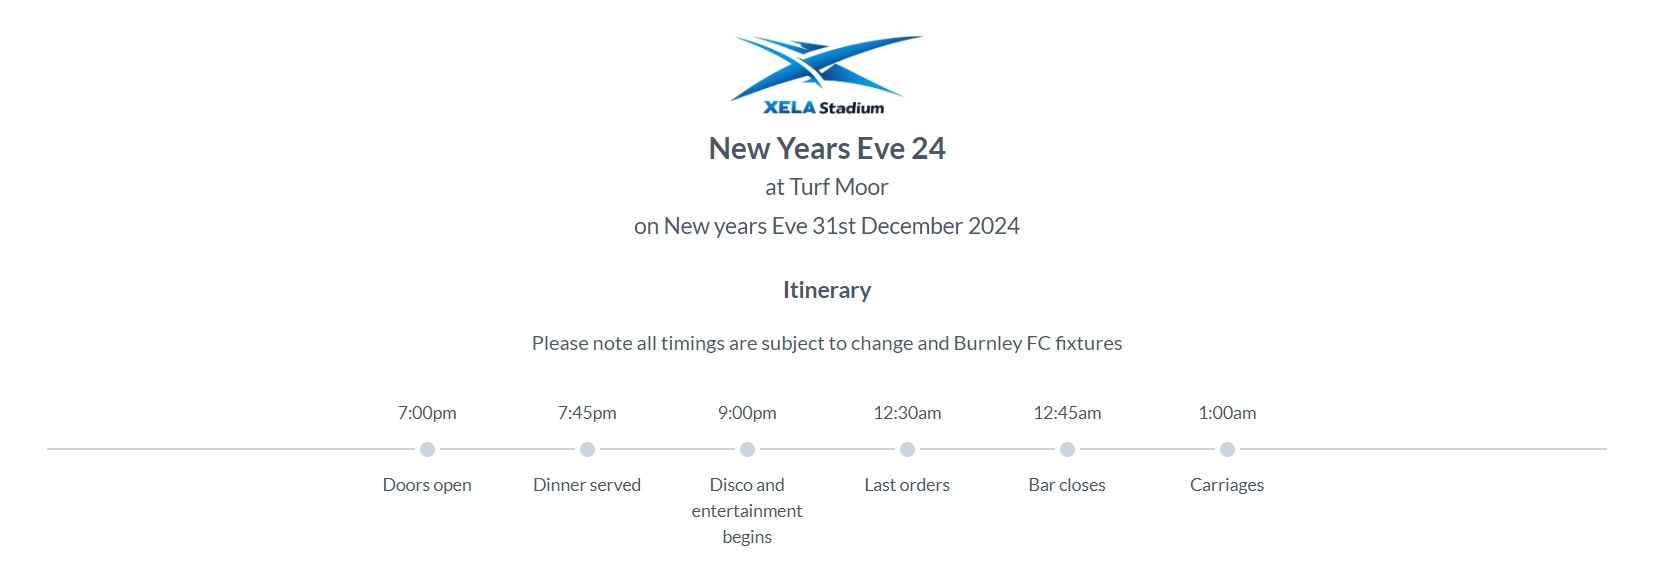
Itineraryis not mandatory, and all the itinerary related fields can be left empty. It is used to set time frames when something will happen at the event, e.g., 10.30 - registration, 11.30 - concert, as illustrated in the client site image below.
Event Menuand narrative: upload a PDF file of any necessary event-related document or information that should be made freely available to customers. This document will appear on the event page as a button. The uploads are not mandatory.
# Right Side Inputs
Event Date.Final Payment Date- due date for full payment of all orders.- Used for payment reminders if they are set up.
- If customers place orders before the final payment date and the event has a deposit option enabled, they will have a choice: either pay the deposit only or pay in full.
- If customers are placing orders after the final payment date, customers will be required to pay in full.
Order Cutoff Date- new orders cannot be placed and old orders cannot be edited after the cutoff date by customers. Admins can still do this manually.Event Archive Date- date when event will be removed from the event list and moved to the archived event list, available onArchive Menu >Archived Events.Capacity Method- choose betweenCoversfor tickets,Shared Tables('Standard' for tables) for the default table configuration with sizes and sharing limits, orRestaurantfor setting table sizes and numbers without sharing between orders. TheCoversoption is set by default for tickets, while table options can be specified on the Table Configuration page.Event Capacity- specifies how many tickets or tables can be sold for this event. If theRestaurantconfiguration is selected, a table with size and number parameters will be displayed in addition to an input field, and the total number of covers on these tables will be calculated automatically. IfEvent Capacityis set to '-1', the Event will show as 'Coming Soon' on the client site. If set to '0', the client site will display a "SOLD OUT" message.
TIP
In the Restaurant configuration, the Event Capacity parameter sets the event limit alongside the combined total of table sizes and numbers, so adjust both parameters to achieve the desired capacity. If either is equalled or exceeded the event will go sold out.
Event Coordinator- will be displayed asContact usinformation to customers.Event Prices Include VAT- checked for inclusive of VAT, unchecked for exclusive of VAT.Tariff- choose the tariff for this event from the tariffs that have been set up. This will only list tariffs appropriate for the inclusive or exclusive VAT chosen. To configure tariffs, please visit Tariffs page.Deposit Amount- this field is shown if the event has a deposit indicated.- If the deposit amount field is left empty, the system will assume this event does not have a deposit and customer will be expected to pay in full.
- If the deposit amount field is set, the customers will be offered option to pay deposit only or pay in full.
- If it is past the final payment date, customers will be required to pay in full, even if the order is being edited.
- If an order has been made for a particular event, the deposit amount field cannot be edited anymore.
Deposit Narrative- this text will be printed on the checkout screen on the customer site to indicate the reason for the deposit.Early Bird Cutoff- select how many days or months before the event date the early bird / price discount will apply (if applicable).Early Bird Discount- set as a percentage (can be a decimal) and will be applied to all products which have been set up as discountable.
TIP
For more information on adding or modifying discounts, please visit the Discount page.
# Bottom Inputs (Products Available for this Exhibition)
The bottom block lists all currently set up products, including products with no pricing set. To enable the products for the selected event, check the checkbox next to the product. This will make products available for this event.
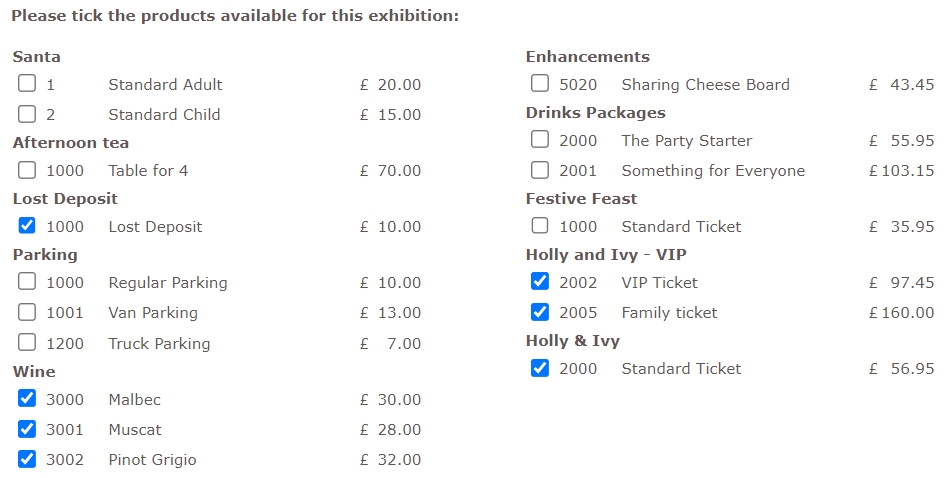
Based on the product setup:
- Products set as tickets are available from the event screen.
- Products set as regular products are available from the order screen.
- Lost place products must be selected if they are intended to be used in the event.
TIP
If a product is not appearing, ensure that you have saved it for the selected event and the product price is set. To add a new product, you can either create a new Product Group or use an existing one, and then add a new Product by selecting the Add option for the chosen Product Group.
# Clone Event
When you click the Clone button, the Clone Events screen will open with input columns on the left and right sides, along with a product block at the bottom. The Clone with Products and Modify screens have a similar structure, but with a distinction: the former comes with a preselected list of products, whereas the latter is intended for modifying an existing event.
